
Every professional has photo props for their subject to sit in, stand on, hold, or just to be in the picture. I thought since I was doing a photo shoot for my soon-to-be-two toddler, I would make a block letter with the number 2 on it.
I found a Pinterest Pin on using cereal boxes to make 3-D block letters. The pin leads you to an easy tutorial. Click me.

The supplies are cheap, in my case I had everything laying around the house. Free is for me!
Supplies:
-Empty Cereal Box
-Tape
-Scissors
-Pen\Sharpie
-Newspaper
-Elmer's Glue
-Water
-Flour
-Paint
1. The first step is to trace the letter\number on the cereal box. I used a piece of computer paper and printed out the number 2 in the font Arial. Then I cut out the number to trace. I am a much better tracer than free hander, but I usually suck at tracing too.


2. Next cut out the letter\number from the box (You will need to make two letters\numbers). Also cut out the sides of the cereal box to make the 3-D part of the block. I cut my sides in half vertically so that the blocks weren't too thick. Now tape the sides to the letter\number. Use long pieces of the cereal box to do the curves. Then tape, tape, tape.


3. Once all the sides are on, tape the second letter\number to the back side. You may need to trim the second letter\number so that they match up better. (Or I might have had to do that because of my mad tracing skillz)

4. Now it's time to paper mache this bad boy. To make the "goop" mix, you combine equal parts water, flour, and glue. This mixture will make the letter\number super sturdy and hard. I used about 4 teaspoons of each for my number, and I really caked it on there.
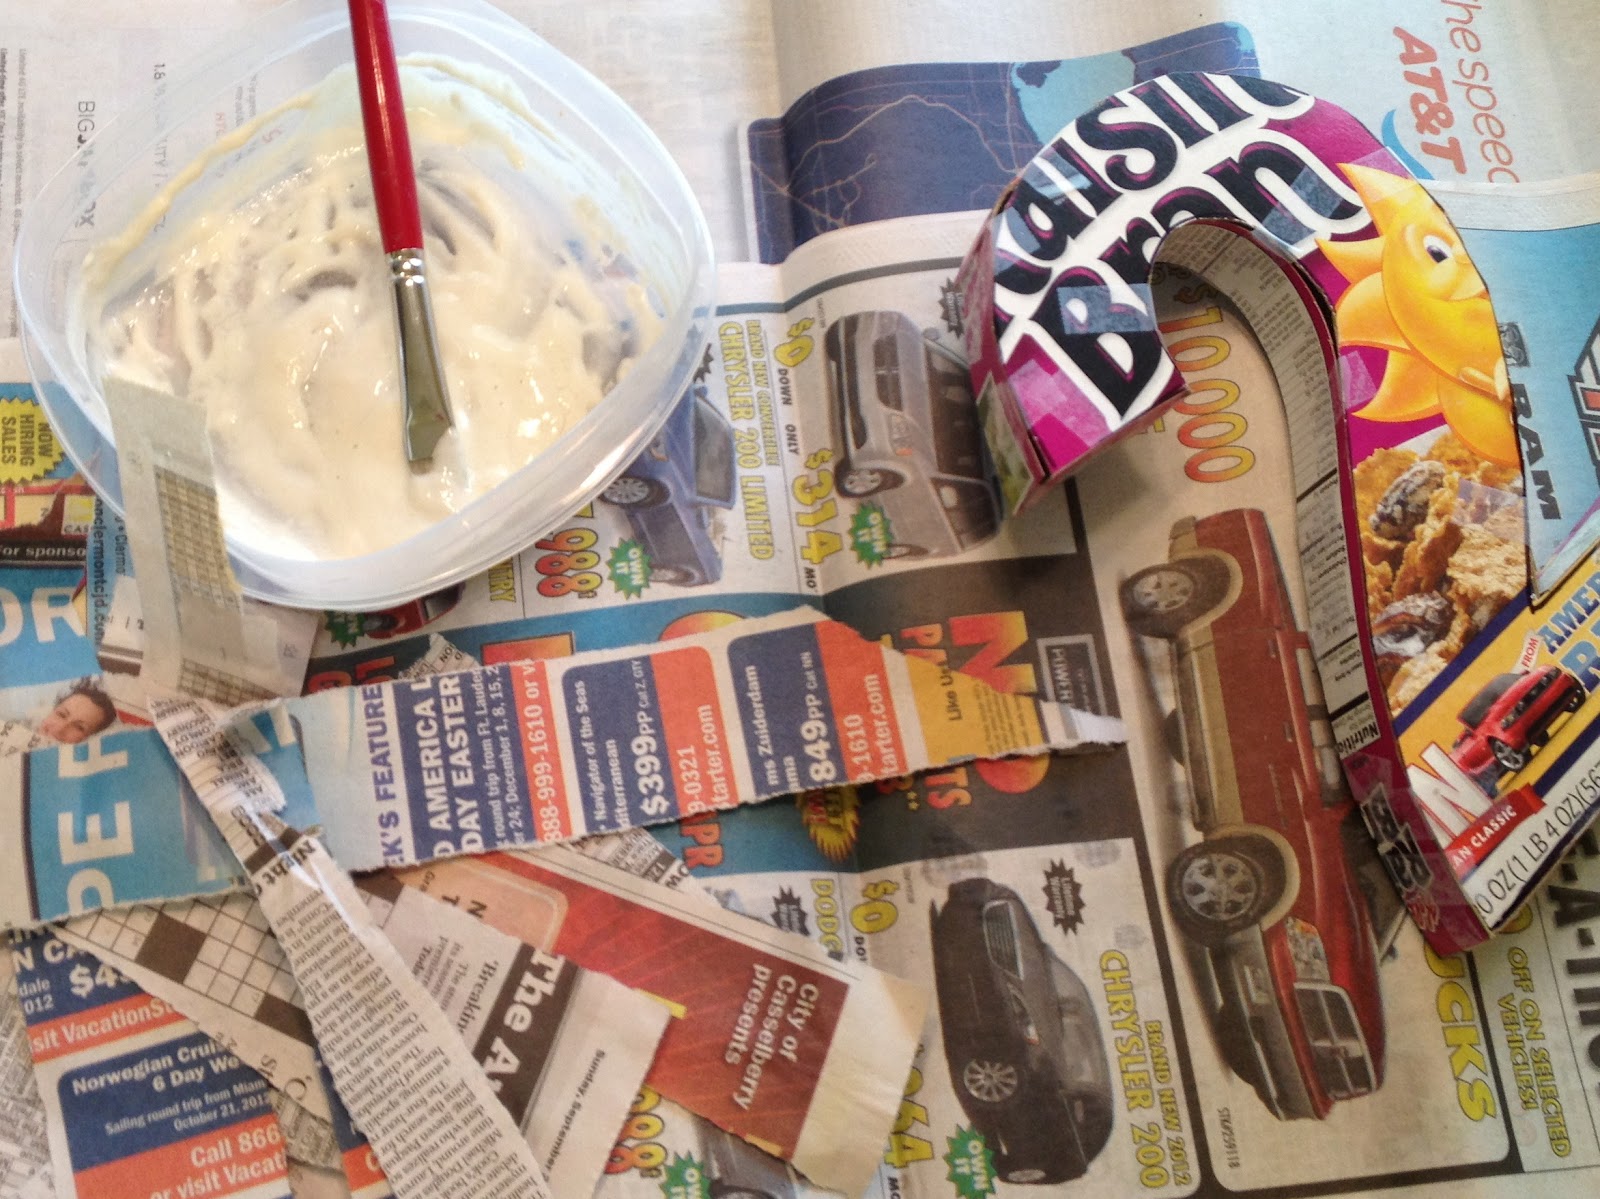
5. Paint the "goop" on a newspaper strip, put the strip on the letter\number, then paint on top of the strip to make sure you got it all. Once you have a layer or two covering the letter\number, it should look something like this. Beautiful!

6. Now comes the fun part. Wait for it to dry... This took a few hours, because I really loaded it with the "goop". Once it is dry, paint it anyway and any color you want. Actually you can only paint it blue.

7. Lastly, take amazing pictures of your creation and post it on your blog.

This pin was a Pinterest Success, now if only I can get my toddler to hold this while I snap a few photos of him, that should be fun.
No comments:
Post a Comment